Cat Doors For Screen Doors
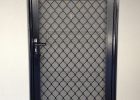
 Hale Flexible Cat Flap Pet Doors For Screens with sizing 1100 X 1100
Cat Doors For Screen Doors – A screen door is a superb way to not just let some fresh air and sun to your home, but also to keep insects and other pests outside in precisely the exact same moment. By employing a screen door, you have the ability to keep your home enclosed, while allowing a breeze, possibly when the weather is warm or anytime you only need to let just a little bit of atmosphere in. Although you can purchase screen doors for your home, they are actually fairly simple to make, requiring just a few tools and supplies, using simple building techniques. Screen doors can be very simple in layout, or could be more elaborate, based upon your needs and building abilities.
Supplies You Will Need, You will need some thin wood stock to use for the screen door construction, a hardware frame for the door itself, and screen meshing, along with a 1/4 inch by 3/4 inch screen molding.
Choose a well-dried timber to avoid future timber shrinkage, warping or swelling. Measure the dimensions of the door you need to build, and cut on the vertical and horizontal pieces to match. While building the door, it can help to clamp the door pieces to a work table. To produce the corner joins, in addition to when adding the center horizontal support piece, you will need to take off half the thickness of a single piece of timber where they will match a saw, so that the overall finished thickness of the joint will be equal to that of a single piece of wood. Use a polyurethane glue and a brush to attach the timber service pieces together, then clamp and allow to dry thoroughly. Once the glue joints are completely dry, you can sand the door, and employ a stain and clear finish, or paint the door if needed.
Adding the Screen to the Door, Putting the door flat on the work table, measure the overall opening and cut a piece of screen material into the proper size, leaving a few inches around the edges to make setup simpler, which is trimmed later. Lay the screen over the surface of the door frame, and staple it to the peak of the frame, pulling it tightly towards the base of the door. Be certain to pull on the screen tightly in the horizontal directions as well, keeping in mind that screen tends to stretch over time. The screen can be soldered right to the door, as the principles will be dealt with by molding which will be set around the border of the screen. After the screen has been stapled securely into position, trim the screen and cover the edges with the screen molding.
Finishing the Job, when the door itself has been assembled, you can install the door frame itself, and also then attach the new screen door into the frame. Attach a door handle and secure the door into the frame with spring hinges so that the door will shut mechanically.

