Tiling A Bathroom Shower Wall
 Pictures Of Bathroom Walls With Tile Walls Which Incorporate A for proportions 768 X 1024
Tiling A Bathroom Shower Wall – Designing and constructing a glass block shower wall or window should not be nuclear physics – but you will find range of sizes and patterns to choose from that could make the task seem difficult. This article will provide specific tips and steps to ensure you get the correct size blocks on your job.
Design Tip # 1 – When to pick a 4″ x 8″ x 4″ block – Since this block may be the skinniest unit it is used either to fill in a window opening where a thin block is required as well as to create a curved kitchen or recreation room bar. If you’re looking for a way to jazz up your selection consider sprinkling in most frosted or colored glass blocks at the same time. It is usually safer to try and prefabricated sections using this block as they are hard to lay using the unit by unit method because of the fact they don’t have much area about the 4″ side.
Design Tip # 2 – When to pick a 6″ x 6″ x 4″ block – This unit is often times useful for either new construction or replacement windows. It looks good when it’s paired in larger commercial openings with the 12″ x 12″ x 4″ sized masonry units. It is available in many of the common patterns including Decora, Wave, Argus, Vue, Clear and Iceberg patterns. This block is hard to use with partition walls because you will find not any finishing end, corner or curved blocks that accompany 6″ sizes.
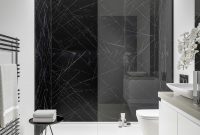
Design Tip # 3 – When to pick a 6″ x 8″ x 4″ block – This unit size is often an excellent choice if you are seeking to complete a shower stall or enclosure. The reason this block breaks down to well is really because the curved glass blocks and many of the finished bull nose end units are made inside 6″ x 8″ x 4″ size. Since this size is not very large it is made in handy if you are created curved walk in shower wall and then there is not a large amount of depth to the shower base.
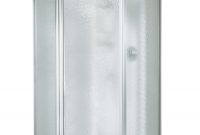
Design Tip # 4 – When to select the 8″ x 8″ x 4″ block – The most cost effective block to create your shower, wall or window with may be the 8 x 8 x 4 size. Since this unit utilizes a small number of units per square foot and also, since the fabrication runs of the size are large their total costs per square foot tend to be probably the most reasonable. Another reason to consider this size may be the end, step down, 45 degree angle, and 90 degree corner blocks are available in this size plus multiple patterns (including Decora, Wave, Icescapes, Iceberg & Clear).
Design Tip # 5- When to make use of 12″ x 12″ x 4″ blocks – The 12″ x 12″ unit can be used primarily for the larger size and mass. This selection is mostly utilized in glass block window and wall in-fill projects predominately inside commercial market. Common patterns include Decora, Wave, Argus, Vue, and Clear.
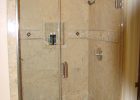
Design Tip #6 – Mix up sizes, colors and frosted alternatives for an original touch- Why be uniform when you’re able to walk out with an original design of your own personal? Mixing the sizes together provides exactly the touch that could produce a project stand out. It is usually easiest to combine blocks like 6″ x 6″ with the 12″ x 12″ units as well as to mix 4″ x 8″ blocks with 8″ x 8″ units. Another option to consider may be the use of colored or frosted glass blocks – utilize a handful of them as accents, stripes or as being a complete wall or window.
Design Tip #7 – If you’re still not sure call the experts – Sometimes it’s easiest and finest to call the block experts to create your shower, window or wall project and take any guesswork out with the process.
Now that you are designed with these sizing tips you need to get up in your glass block shower wall or window project.


