Tiling A Shower Wall With Large Tiles
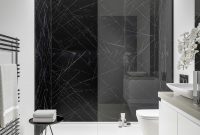
 Large Format Tile Bathroom Time Lapse Installed With Progress regarding proportions 1440 X 1080
Tiling A Shower Wall With Large Tiles – Choosing the best shower or bathtub wall surround can often be difficult. Should you install acrylic, a good surface material like Swanstone, or use decorative tiles? Will the grade of these products stand test of your energy? Which one is the best match for the budget and tastes? Learn 7 practical steps to determine which wall product is best for you.
Step 1 – Determine if you want to look at your existing walls – To save money it’s nice to place a bathtub or shower wall surround over an existing surface. It is possible to use specialized glue or butyl tape to adhere acrylic or Swanstone solid surface materials over existing tile so long as the present walls aren’t spongy or bowed. If you have a plastic or fiberglass system it’s not at all possible to place new walls over your existing materials. In these cases the present system should removed, new backerboard installed then new walls offered.
Step 2 – Think through your budget- If you’re similar to you wish to get the best deal for the money – an exceptional material which doesn’t break your budget. If you desire a simple to clean cost effective material acrylic is an excellent choice. It is warm to the touch, installs quickly and comes with a lifetime warranty.
For a much more elegant appearance (which is available in more decorative patterns and designs) look at a Swanstone solid surface wall. Swanstone is simple to keep up, has no joints to grout or seal and will come in lots of choices. Usually the costliest technique is tile (unless you are able to set it up yourself and save the labor hours- tile is easily the most time intensive to set up vs. sheet products like acrylic & Swanstone). There are limitless choices and price ranges of tile also it creates a stylish look as well.
Step 3 – Select your material, designs, colors and accents you want – After you’ve selected between acrylic, Swanstone and tile it is time to choose your design and color(s). Acrylic wall surrounds are available in a multitude of colors, patterns and finishes. There are solid, granite, metallic and also marble finishes. In addition the walls you choose could be smooth, 4″ x 4″ simulated tiles, 8″ x 10″ simulated tiles or even a stone look. Acrylic has stopped being just a white smooth faced wall.
Swanstone, although it has become noted for it’s strength, color and texture consistent, grout-free quality, along with the fact it won’t crack or craze – has a very broad range of decorative options as well. There are over 45 standard, shiny, and granite colors. In addition there are decorative panels to make unique architectural designs named Pebble, Geometric, Beadboard, Tangier and Barcelona. There are also designer trim pieces and rosettes to generate a finished look. Tile provides the widest product options with regards to color, accents, borders, sizes and thicknesses. Make sure to get a high density water resistant tile for the bath or shower.
Step 4 -Choose your backerboard. Select material to adhere the wall material as well as in the situation of tile finish the face area in the wall- What you do not see in the bathtub or shower wall panel project is as essential as whatever you do see. Use the right material(s) behind the wall. Here are some recommendations: Acrylic – If the tile walls come in good shape install over them by adhering the acrylic with butyl tape and color match sealant. This will save the landfill costs, reduce the project installation serious amounts of save money. If the existing wall can’t be installed over offered moisture resistant green board or a cement backer board. Swanstone – Like acrylic if the tile is at good structural shape install on the existing. If not, Swanstone could be installed over greenboard or a cement board using special glue.
Tile – Poorly done tile installations have caused lots of wasted money historically (cheap backer board could have been used, poor grouting jobs, poor operate in the corners are just a few in the problems). For tile installations never use green board – use whether water resistant cement board or a waterproof extruded polystyrene board prefer that produced from Wedi Corporation. These boards should be glued and screwed in your framing. In addition to with all the right backer board consider investing in the urethane grout. This type of grout doesn’t must be resealed and is also waterproof. Although it costs more up front it is going to save money down the road inside must regrout, or worse yet the must redo the shower when you have any water damage.
Step 5 – Fix what’s behind the wall – The best time to correct a poor performing shower valve, a shower head which is too low, or to add backer material to bolster the installation of your accessories is when you have the wall opened up.
Step 6 – Identify the bathtub tub and shower accessories you wish to add function and type in your project – Have you always wanted a leg ledge for shaving, a corner seat, a curved shower rod to hold water in, a hand held shower, a corner caddy, a frameless shower door, shampoo or soap niche or a grab bar? When you’re installing new wall surrounds is the ideal time to accessorize your bath or shower to make it work for you and your family.
Step 7 – If the process sounds too difficult call a reputable contractor that’s not a “one size fits all” – Let’s face it, there are plenty of choices and installation details that must be done efficiently to make sure a successful project. Calling an expert could possibly be more expensive inside short term but save you long term costs. Make sure to go with a contractor it doesn’t try to push you into the one type of shower or bath wall surround system they sell (for instance a company selling acrylic systems pushes this solution you). Look for a company skilled and competent in multiple systems that will aim to understand your preferences, budgets and tastes and provide alternative ideas.
Know you’re designed with 7 steps which will function as good outline to plan your acrylic, Swanstone or tile bathtub or shower wall surround installation.


